Current Activity
Jim Chapple is now working full time on iphone/ipod touch and iPad applications.
Jim Chapple also works on Mac OS X Apps.
Please email Jim Chapple for support issues, information and quotes.
Simple Checklist
- Allows you to quickly add tasks to be done.
- Allows for the quick setting of the status and for moving tasks between the priority lists.
- Allows you to mark tasks as delegated to others.
- Allows you to make notes for a task.
- Allows for quick deletion of a task.
New to version 1.1 - All screens can be rotated to be in Landscape mode. This is especially useful when using the keyboard because all the keys are larger.

The small thumbnail images below will show larger iPad screenshots.


FAQ: This App does not work properly it keeps on crashing, why?
Sometimes Apps just do not download properly. You will need to download it again, for free, using itunes. See Apple Support Pages
About half way down the page there's a set of instructions that starts 'Reinstall the affected application'.
Once iTunes has it then you sync your device and it should then work. If it does not then please to contact me.

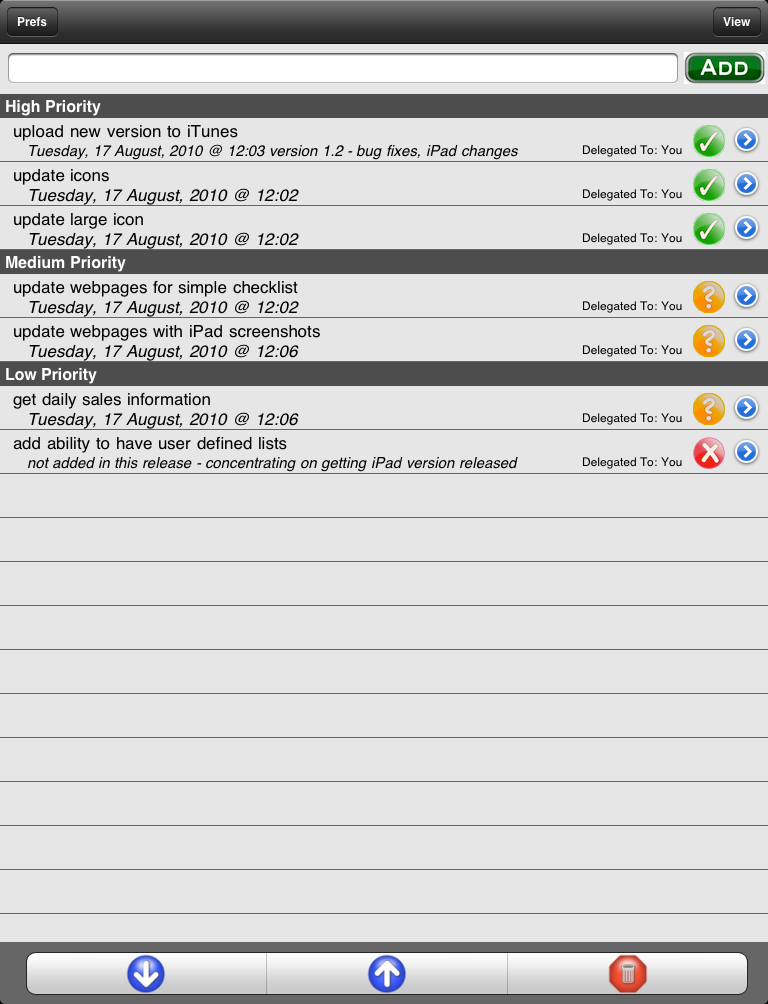
When the Application StartsThe App initialises itself to read all the check list items already entered. Obviously the first time it starts there are no saved items so the three lists are empty. The main screen of the App is the list of tasks held in three lists of differering priority: High, Medium and Low. Swiping up and down will move the table of tasks up and down so all can be viewed. At the top is a text field where new tasks can be added. Touch the field and the keyboard is shown. Type in the information and then select the green plus icon. The task is added to the default priority list at the top of the list. The default priority can be set in the preferences. Below the tasks are three buttons. The first two allow you to move a task within each list. Just select the task you want to move and the select the up and down arrows. If you reach the top of the low/medium priority list another up arrow will move the task to the next higher priority and the reverse with the down arrow. The octagonal red trash can icon will delete the selected task. The alert first asks for confirmation. Selecting Yes permanently deletes the task you cannot recover it. At the top of the screen the prefs button takes you to the preferences page and the view button will take you to the details page of the currently selected task. |
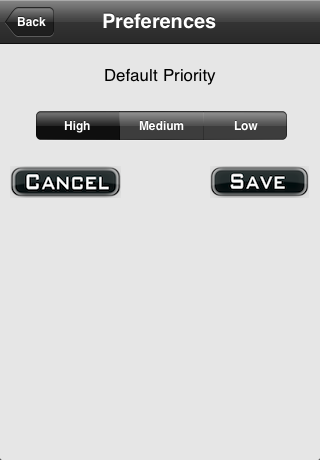
The Preferences PageSelect the Preferences button on the Main Screen and the preferences page is shown. To change the behaviour of the program you have to save the preferences. There is only one preference and that is to set the default priority for all new tasks. Select the priority you want and select Save. You might decide to make all new tasks High Priority and then move them to the appropriate priority when you have more time to assess them. Or you may decide to make all new tasks Medium priority/Low Priority and move them up to High Priority in an effort to keep the High Priority task list as small as possible. It is your choice. |

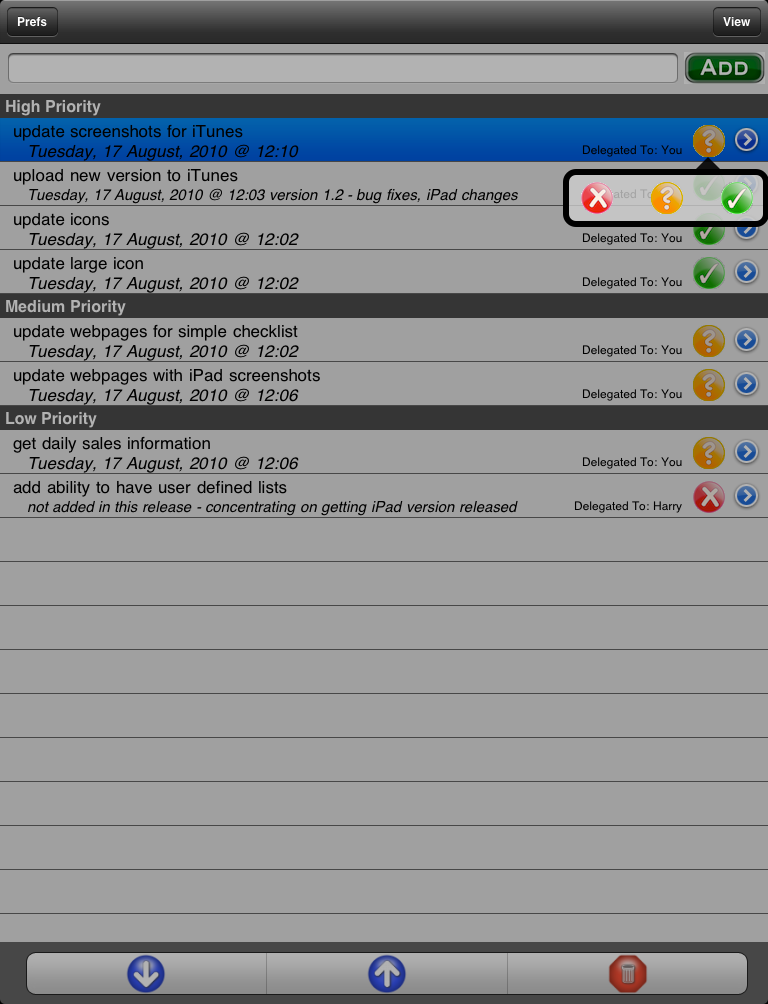
Main Page - Task StatusThis screenshot shows the main page at the point the status of a task is to be changed. To do this you need to select the status icon for the task in the list. When you do this the screen changes to show the three possible status values in their own panel. The black triangle that is part of the panel's border always points at the status to be changed. To change the status of a task just select the appropriate icon. All tasks start with the question mark status. I interpret this to mean: There is a task and I have not yet decided whether to do it (and set it to tick) or to not do it (and to set it to cross). The tick icon means the task was done. The cross icon means the task was not done. There are plenty of times when you may think you have to do something but in the end you do not. I find it useful to be able to distinguish between these two states, Done and Not Done, and that is why there is the third state, the question mark. |
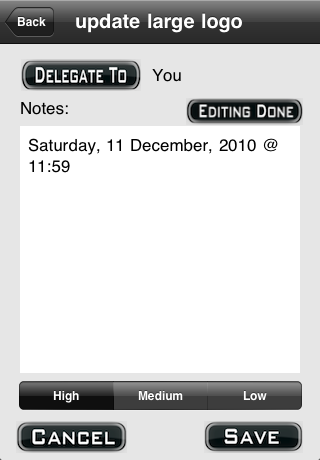
The Task's Details PageOn the main page if you select the right arrow for a task then this page is shown for the task. This page allows you to change the Priority of the task, to delegate the task and to add notes for the task. The Priority selector shows the current priority of the task. To change the priority select the desired priority and select Save. The task will be removed from its old priority list and added to the top of the new priority list. To add Notes for a task touch the notes field and the keyboard will be shown. When a task is created the time and date it was added is put into the notes field so you see when you created it. This information can be left or deleted. The notes field can say whatever you want. To dismiss the keyboard you have to press the 'Editing Done' button. At the top the task shows who it is delegated to. All tasks default to 'You'. You can change this by selecting 'Delegated To:' button. |
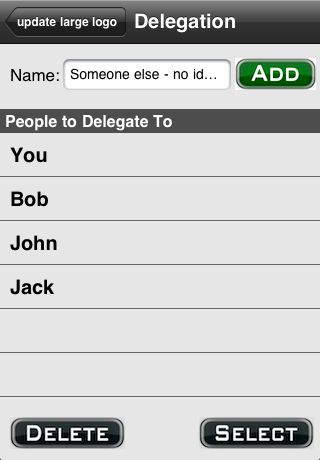
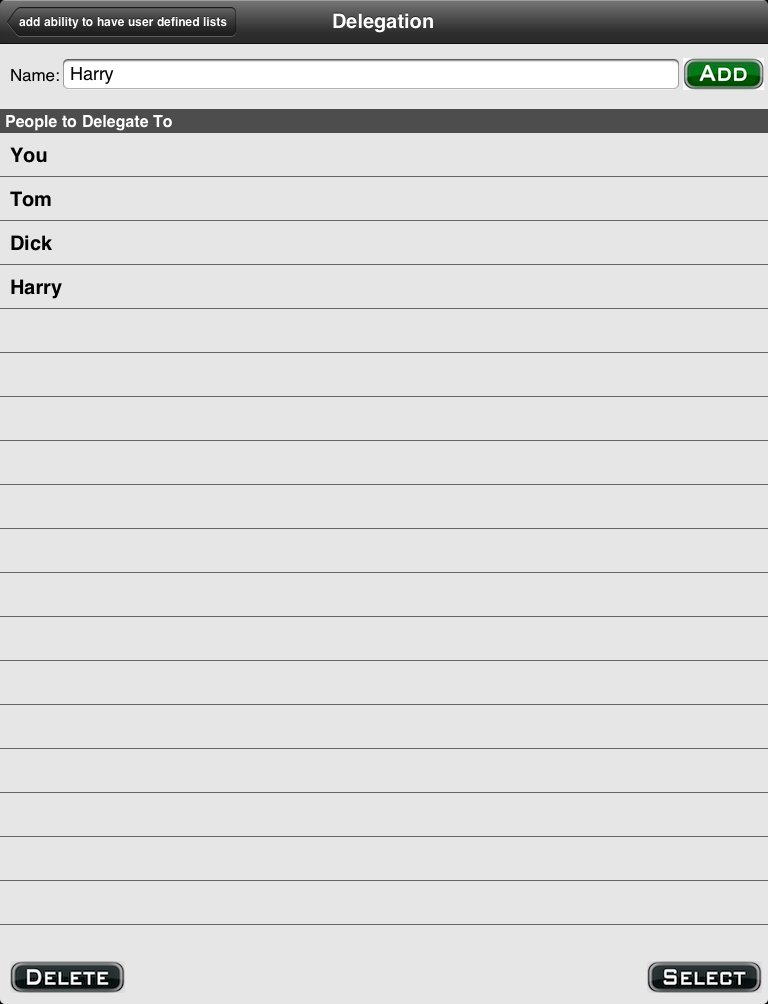
Delegation PageThis is the page that allows you to change who a task is delegated to. Initially you will be the only one in the list. You can add people by typing their name into the field and pressing the plus sign. This will add them to the table below. Select them in the list and press 'Select'. This will take you back to the details page. You need to save this change for it to have an effect. The delegates can be people but it can equally be a department, an organisation, a pool of people etc. You can put what you want. You can also delete people from the delegates. Select the person in the list and then select delete. The delegate is removed from the list. This does not change any tasks that are delegated to that person. |