Current Activity
Jim Chapple is now working full time on iphone/ipod touch and iPad applications.
Jim Chapple also works on Mac OS X Apps.
Please email Jim Chapple for support issues, information and quotes.
Simple Week Budget App
- Allows you to quickly and simply enter expenses for each week and track how you are against the week's budget.
- Provides a Graph View that shows expenditure and budget and can show whether you are exceeding your budgets.
- Enter expenses for any week. Edit expenses already entered. Delete expenses. Change the budget for a Week.

The small thumbnail images below will show larger iPad screenshots.


The following screenshots are from the iPhone. If you have the iPad version then the main difference is that the screens have expanded to use the full screen resolution of the iPad and so you can see more information without scrolling the various tables.
FAQ: This App does not work properly it keeps on crashing, why?
Sometimes Apps just do not download properly. You will need to download it again, for free, using itunes. See Apple Support Pages
About half way down the page there's a set of instructions that starts 'Reinstall the affected application'.
Once iTunes has it then you sync your device and it should then work. If it does not then please to contact me.
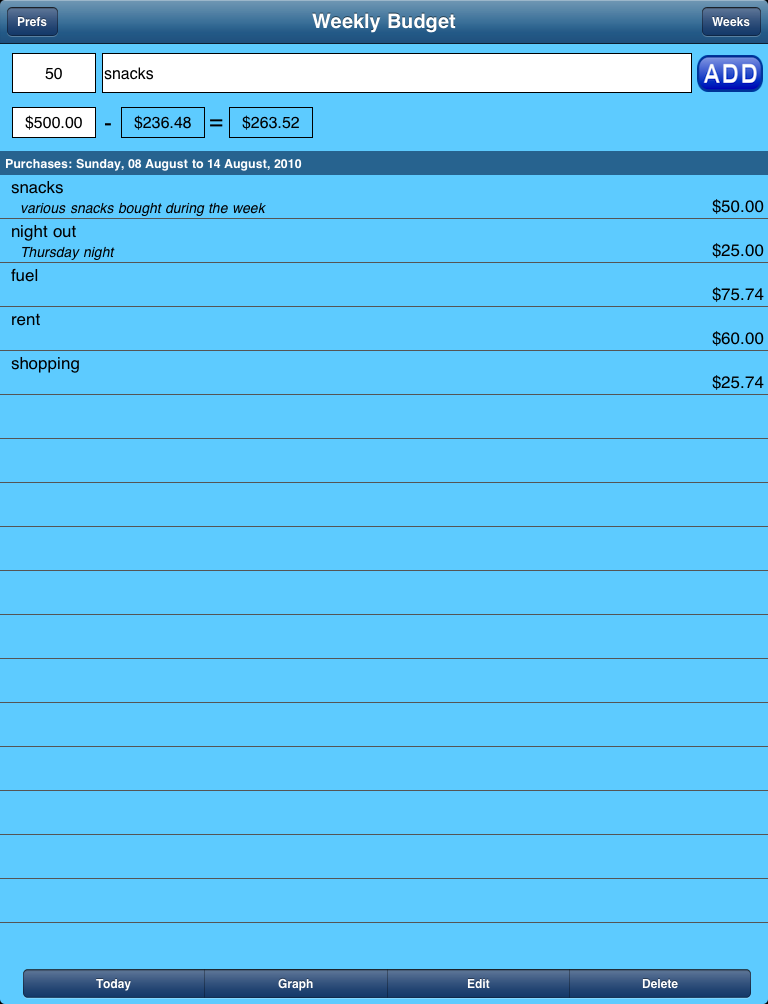
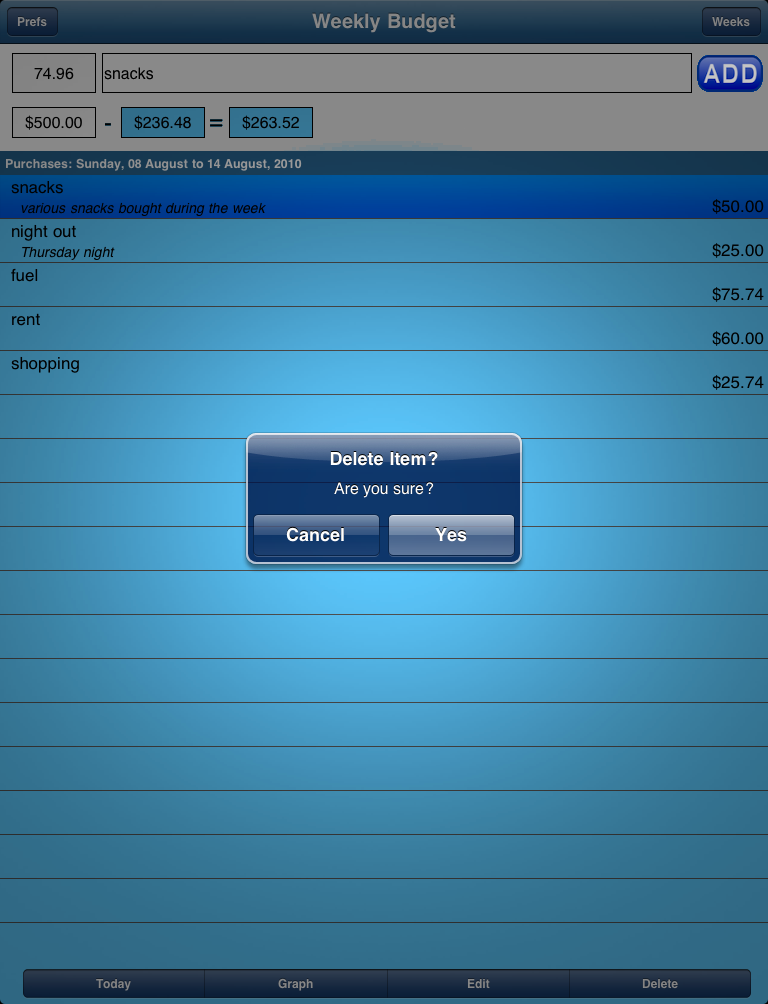
When the Application StartsThe App initialises itself to read all the previously entered information for the weeks already entered. Obviously the first time it starts there is no saved information. The main screen of the App is the screen where you can enter the expenses for the week. It is really very simple to add an expense. At the top of the screen are two fields: one for the amount and one a quick description of the expense. Enter these two values and press the green plus key to the right. The new expense will be added to the table below that shows the expenses for the week. The week you are adding to is shown above the table. The information just above the date will also change. The first field is the budget for the week and can be changed by selecting the field and putting in the new number. Next is the amount spent so far. The final field is the remaining budget or the overspend. If you have overspent the field changes to red. Below the table are four buttons. The 'Today' button will always take you back to the expenses information for this week. The 'Chart' button will show you the chart for the last 26 weeks. The 'Edit' button will allow you to change information for the expense selected in the table. The 'Delete' button will allow you to delete an expense. The budget for a week can be easily changed by selecting the budget field. The keypad will be shown. Type in the budget you want and select OK. The new budget will be saved and the numbers adjusted accordingly. |

The Graph ScreenThe Graph Screen of the App shows you your expenses, budget and under/overspends for the last 26 weeks. Swipe left to right to move the graph to show more weeks previous to what you were looking at. Swipe right to left to see more weeks later than you were looking at. The graph moves by 4 weeks each time. Each week is made up of two pieces of information. Look at the top of the white bar to the left and the scale will show the budget for that week. Look at zero for the week and if the white bar is partly green then that means that you did not exceed the budget for the week. The height of the green bar shows how much of the budget for that week was left. If the white bar is shown down to zero and below that is a red bar extending downwards then this shows that you overspent. The depth of the red bar shows how much you overspent by. You are doing well if most weeks have a white bar with a green bottom section. However, if most weeks show an empty (all white) bar and a red bar below then you are not doing so well. The chart also shows that not all weeks have to have the same budget. Some weeks can have more. This chart shows that most weeks have been allocated the same budget (200 pounds/dollars/euros in this case) but some have been allocated more and some less. It is completely up to you to decided how much budget you have per week. |
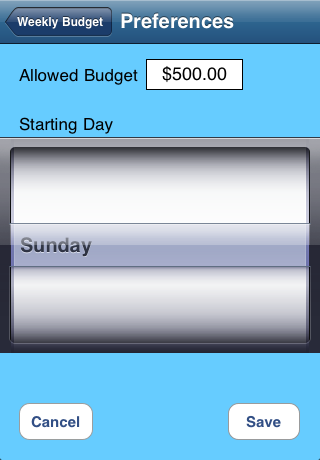
The Preferences PageSelect the Preferences button on the Main Screen and the preferences page is shown. There are two preferences, the default budget amount and what day of the week you want each week to start on. The default budget is used whenever a new week is to be created. Select the field and the number keypad will be shown. Change the value to whatever default you want. The second field is the day of the week each week is to start on. So if you are paid on a Thursday you might start your budget week on Thursday because your bank account has fresh funds in it on Thursday. You don't have to, of course, you can choose any day you want. Select Save and the budget and the weekday will be saved. This screenshot shows that Sunday has already been selected as the start day. When the App first starts it will force you to set these preferences and save. The App does this because it needs to know what day to start a week on so it can determine the weeks to be shown. |

Edit the information for an ExpenseOn the main page select the expense in the table and select the 'Edit' button at the bottom. The edit page will be shown. You can edit the basic description shown in the table. You can edit the amount. You can add additional notes for the expense. When you edit the notes the keyboard is dismissed by selecting the 'Editing Done' button. To save these changes select 'Save'. The view will change back to the main view and all the information will be updated to reflect the changes made. |

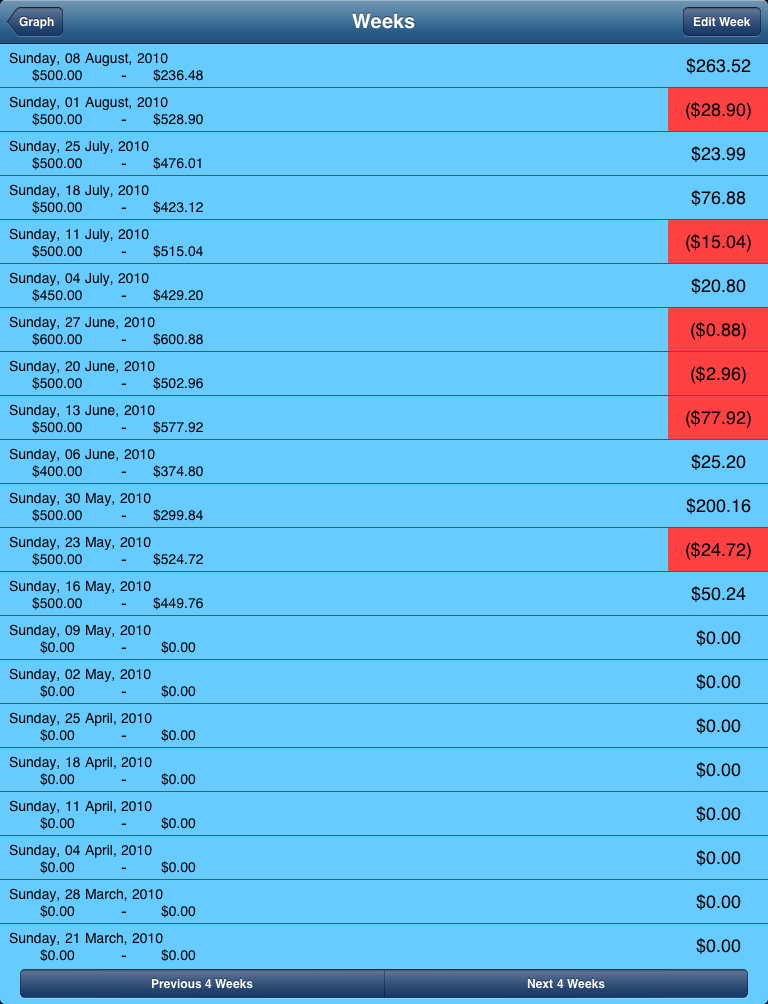
Weeks List PageOn the Main Page is a button marked 'Weeks'. Selecting this button takes you to the Weeks View where you can select to Edit the values for any week you choose. The list shows you 26 weeks of information at a time. The 'Previous 4 weeks' and 'Next 4 weeks' buttons make the table update with the new set of weeks to be shown. You can select to change the values for a week by selecting that week in the list and then selecting 'Edit Week'. Each week in the list shows the budget what was spent and what remains/or was overspent. If the week was overspent then the value is shown in red. |

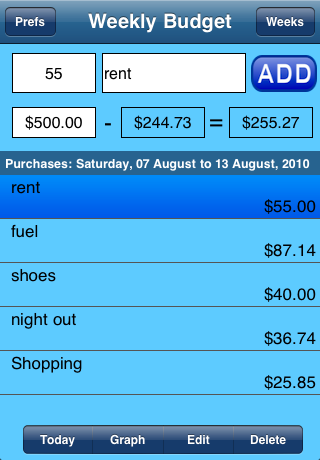
Edit a different weekThe 'Edit Week' button changes the view to the main view. This is exactly the same as though you were entering expenses for this week but the week being edited is the one you selected. The 'Edit' and 'Delete' buttons act on the purchases for the week selected. The date field shows the week you are editing and the expenses and information for that week. This allows you to go back and add expenses to a week that you did not do on the week. What can also be done using this ability to edit any week whether it is in the past or the future is you can add expenses to a week in the future. If you know that in 6 weeks time you have an expense to pay then you can add it to the week in the future and be able to see this at any time by just moving the graph or the weeks view forward. And this reveals the reason for the 'Today' button. Press this button and the main view will change back to the expenses for the current week. |